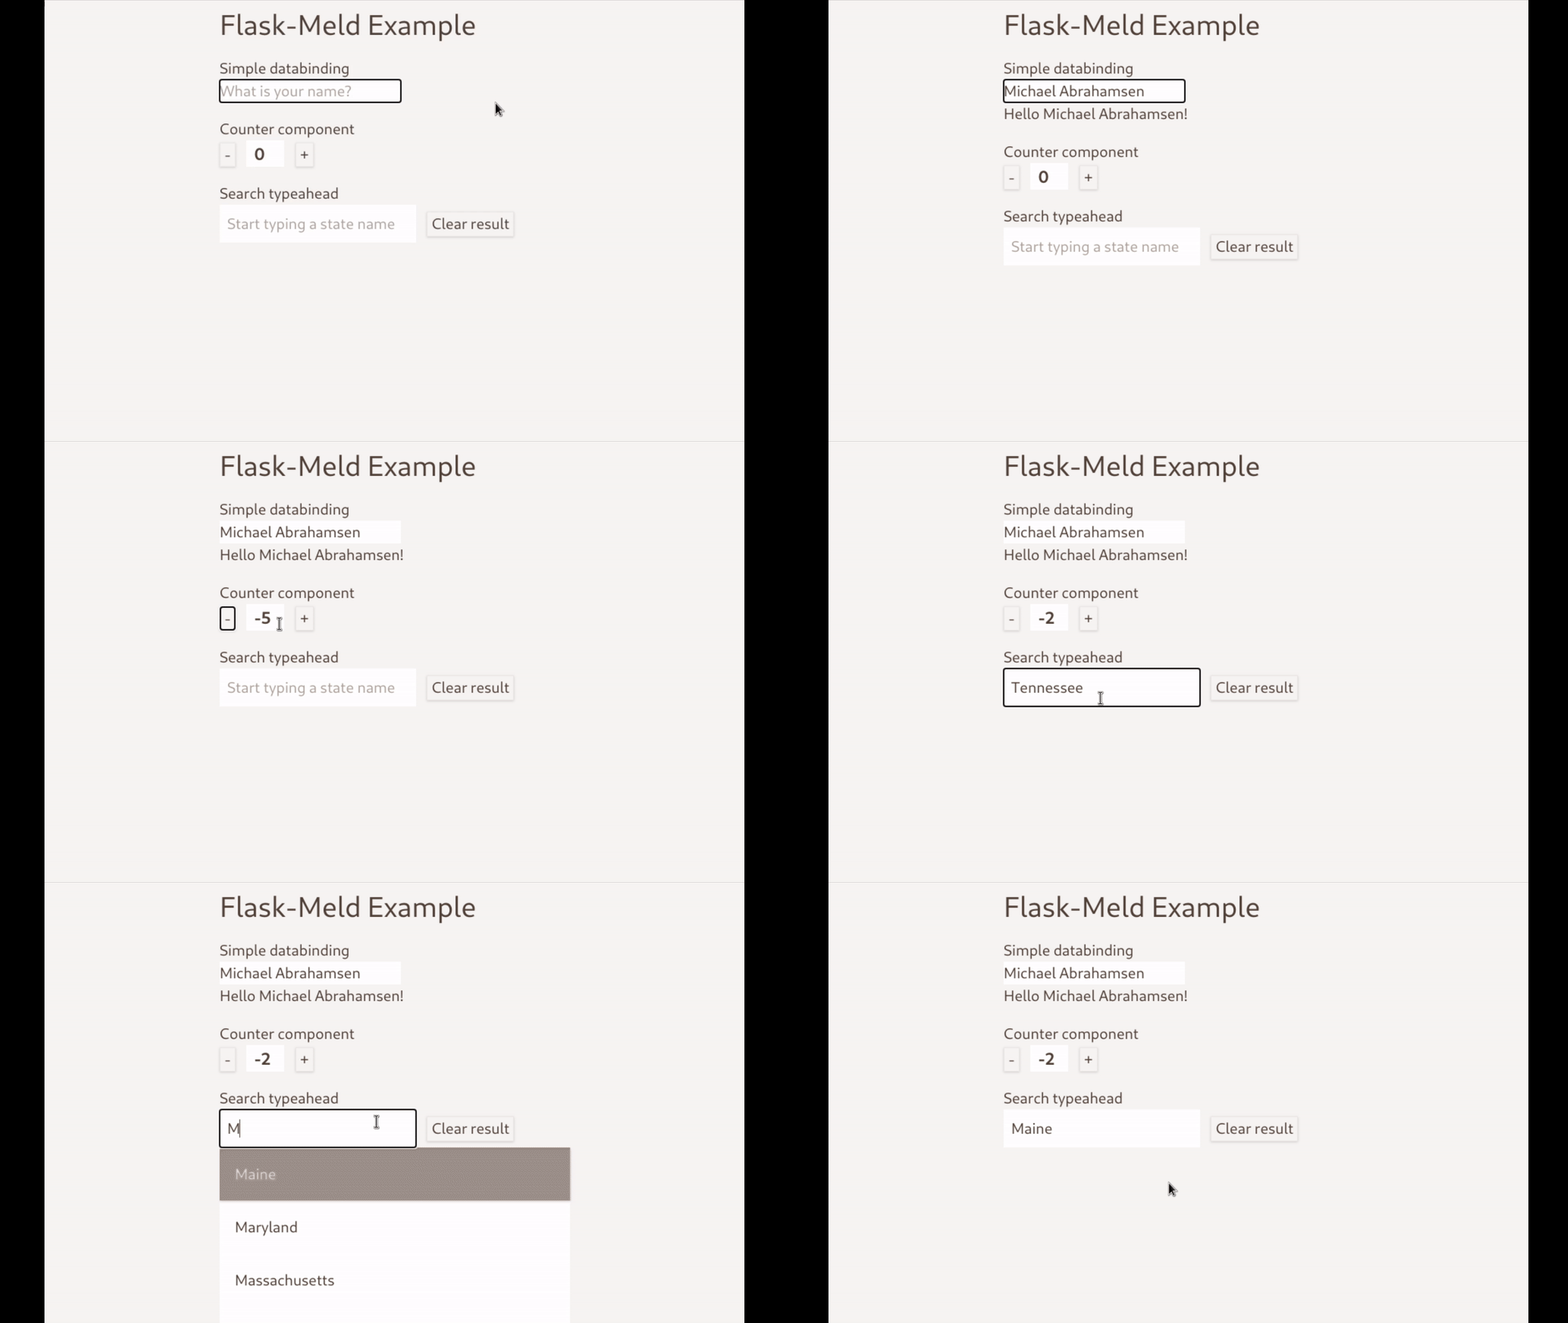
Flask-Meld, ditch JavaScript frameworks for pure Python joy!
Posted on Fri 04 December 2020 in flask-meld
Introducing a new way to build web applications: Flask-Meld
Before we dive in, I would like to give credit where credit is due. This extension was heavily inspired by the following projects and people:
- Phoenix LiveView the original inspiration!
- @calebporzio for his work on Laravel Livewire which proved the idea can work outside of Erlang/Elixer/Phoenix.
- A special shoutout to @adamghill for his work on Django-Unicorn. His code helped bring the first working prototype for Meld!
There is something I would like to share with everyone. Having tried just about every JS framework out there, there hasn't been a workflow that I have enjoyed. Until now! Yet here I am, writing a whole lot of JavaScript so that I can write less JavaScript. I am an engineer, after all.
Having never written a Flask extension before, this felt a bit intimidating at first. After looking at how a few other extensions worked, all that was needed was to add a couple of custom tags and import a javascript file. With the help of Django-Unicorn and Laravel Livewire I was able to get a pretty decent understanding of how the whole dataflow worked. A few days later, Flask-Meld was born.
There is not a programming project that I have enjoyed more than working on this extension. I want to show how it works and how it can help you create dynamic web interfaces in pure Python.
- Less context switching.
- No need to write JavaScript.
- More fun!
Flask-Meld utilizes WebSockets and morphdom to create server-rendered HTML and swap out DOM elements without refreshing the page.
The source code shown here can be found at https://github.com/mikeabrahamsen/Flask-Meld-Example.
There are three parts to this:
- The Flask application
- The Flask-Meld Components
- Plain jinja templating
The Flask application
For the sake of example, here is a minimal Flask application to get things running:
from flask import Flask, render_template
from flask_meld import Meld

app = Flask(__name__)
app.config['SECRET_KEY'] = 'big!secret'
socketio = app.socketio

meld = Meld()
meld.init_app(app)


@app.route('/')
def index():
    return render_template("base.html")

if __name__ == '__main__':
    socketio.run(app)
This sets up the application and initializes Flask-Meld.
The base.html file is a simple jinja template that loads the Meld scripts and
loads a few components on to the page.
<!DOCTYPE html>
<html>
    <head>
        <title>Flask-Meld Example</title>
    </head>
    <body>
        <div>
        {% block content %}
            <!-- Using a component in your template is easy! -->
            {% meld 'counter' %}
        {% endblock %}
        </div>
        <!-- Add the line below to include the necessary meld scripts-->
        {% meld_scripts %}
    </body>
</html>
There are only a couple things worth noting here. The {% meld_scripts %} and {% meld 'counter' %}.
{% meld_scripts %} - This initializes the meld javascript file so that
components work.
{% meld 'counter' %} - This is how you add a component to a page. This is much
like using {% include 'counter.html' %} but with the difference being that it
looks for template named counter.html in templates/meld and subsequently
tells Flask-Meld to look for a file named counter.py in meld/components to power the
component.
Components
Files placed in meld/components define the data model and functions that the
templates will use.
Components are simple Python classes.
The counter component:
# app/meld/components/counter.py

from flask_meld.component import Component


class Counter(Component):
    count = 0

    def add(self):
        self.count = int(self.count) + 1

    def subtract(self):
        self.count = int(self.count) - 1
Templates
Create a file within the templates/meld directory, include {% meld 'component_name' %} where
you want the component to load.
{# meld/templates/counter.html #}
<div>
    <button meld:click="subtract">-</button>
    <input type="text" meld:model="count" readonly></input>
    <button meld:click="add">+</button>
</div>
The buttons use meld:click to call the add or subtract function of the
Counter component.
The input uses meld:model to bind the input to the count property on the
Counter component.
Pretty simple right? You can use this to create dynamic user interfaces using pure Python and HTML. This is just the beginning. Form handling and validation coming soon!
Reach out on Twitter @mikeabrahamsen and let me know what you think. Feedback appreciated!
