Getting started with Conveyor
Posted on Mon 30 March 2020 in conveyor
Before you start
Before you get started with Conveyor you will need the following:
- A domain name
- A Github account
- Digital Ocean or Linode account
Create a Conveyor.dev account
To get started you will need to create an account on Conveyor.dev
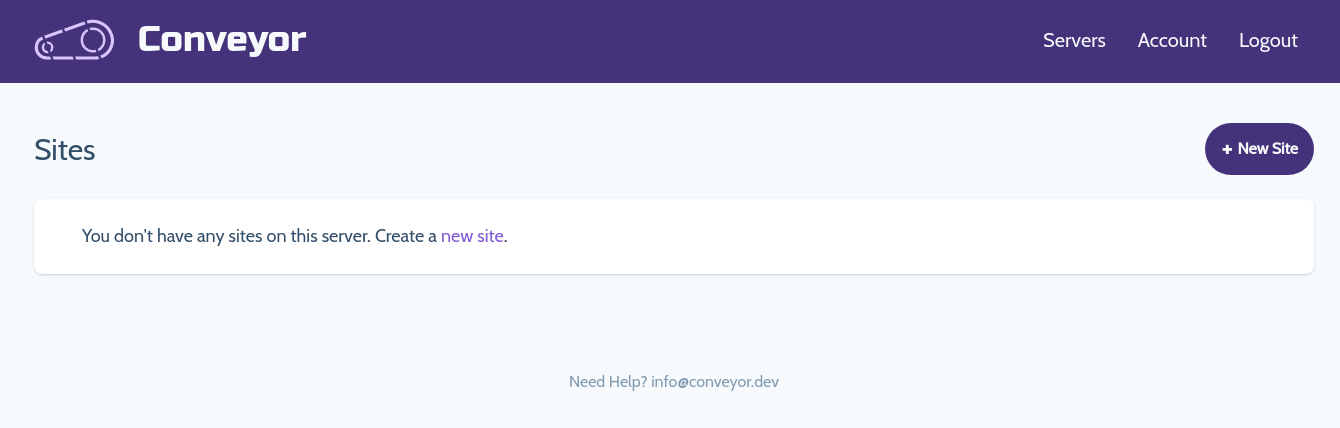
When you log in for the first time you will see the Sites page.
Create a new site
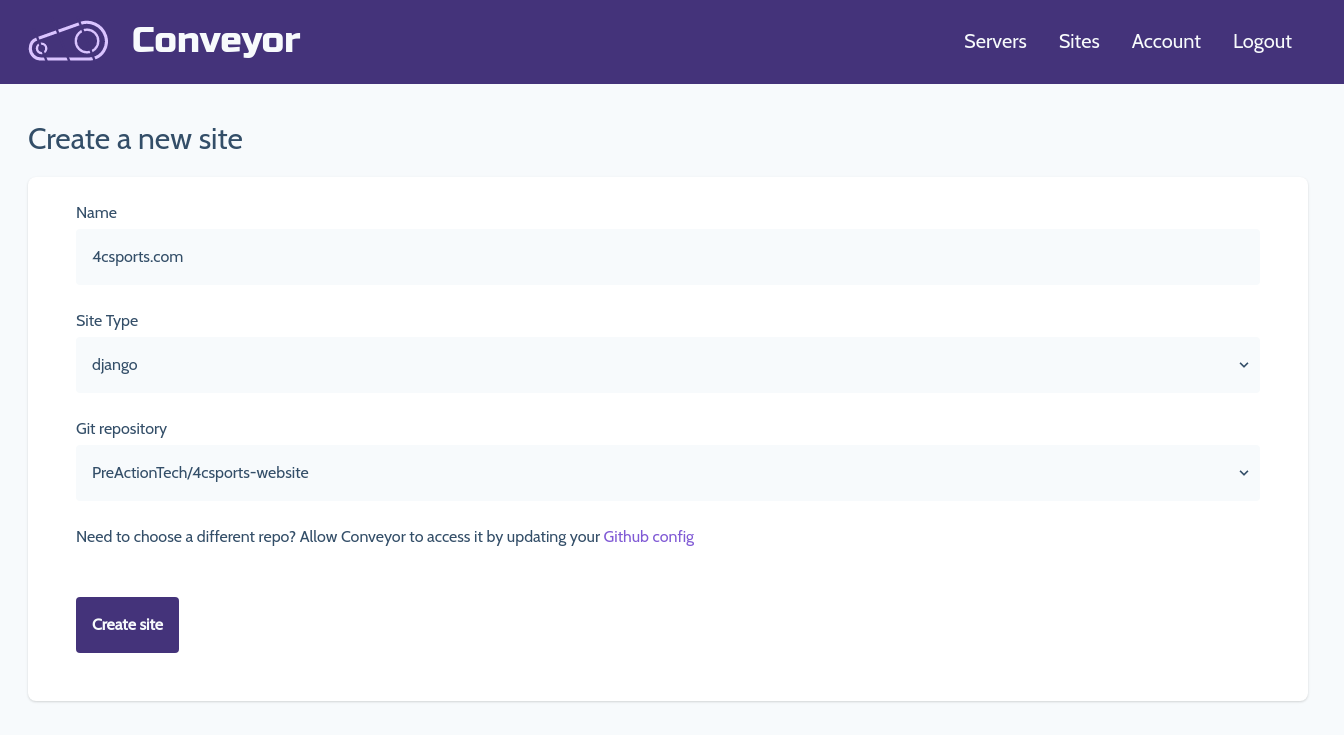 When you first try to create a new site you will be asked to link your github
account. At this point you will specify the repository for the application
you would like to launch as well as a few details about the site.
When you first try to create a new site you will be asked to link your github
account. At this point you will specify the repository for the application
you would like to launch as well as a few details about the site.
- Log in to github if you are not already
- Verify permissions
- Refresh repo list
- Enter domain name
- Select site type (Django, Flask, Static)
- Select the repository that stores the app you would like to launch
- Create the site
Install your site on a server
At this point you will need to select a server to host your site. You can use Digital Ocean or Linode as a server provider. Log in to your server provider account though Conveyor to allow us to provision a server for you.
The first time you provision a server you will need to connect to a server provider
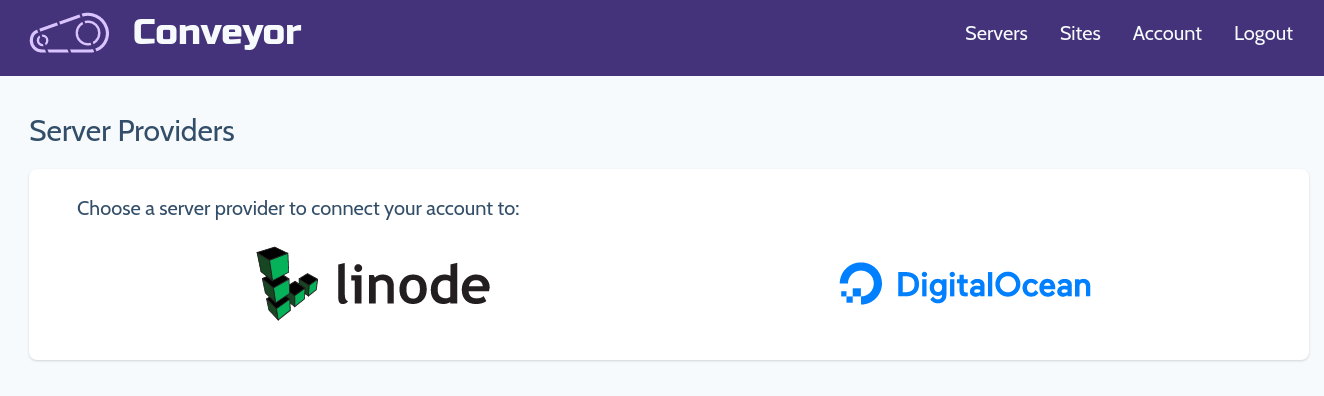
You can add multiple server providers so if you do that you will need to select the server provider that will be used to provision a server
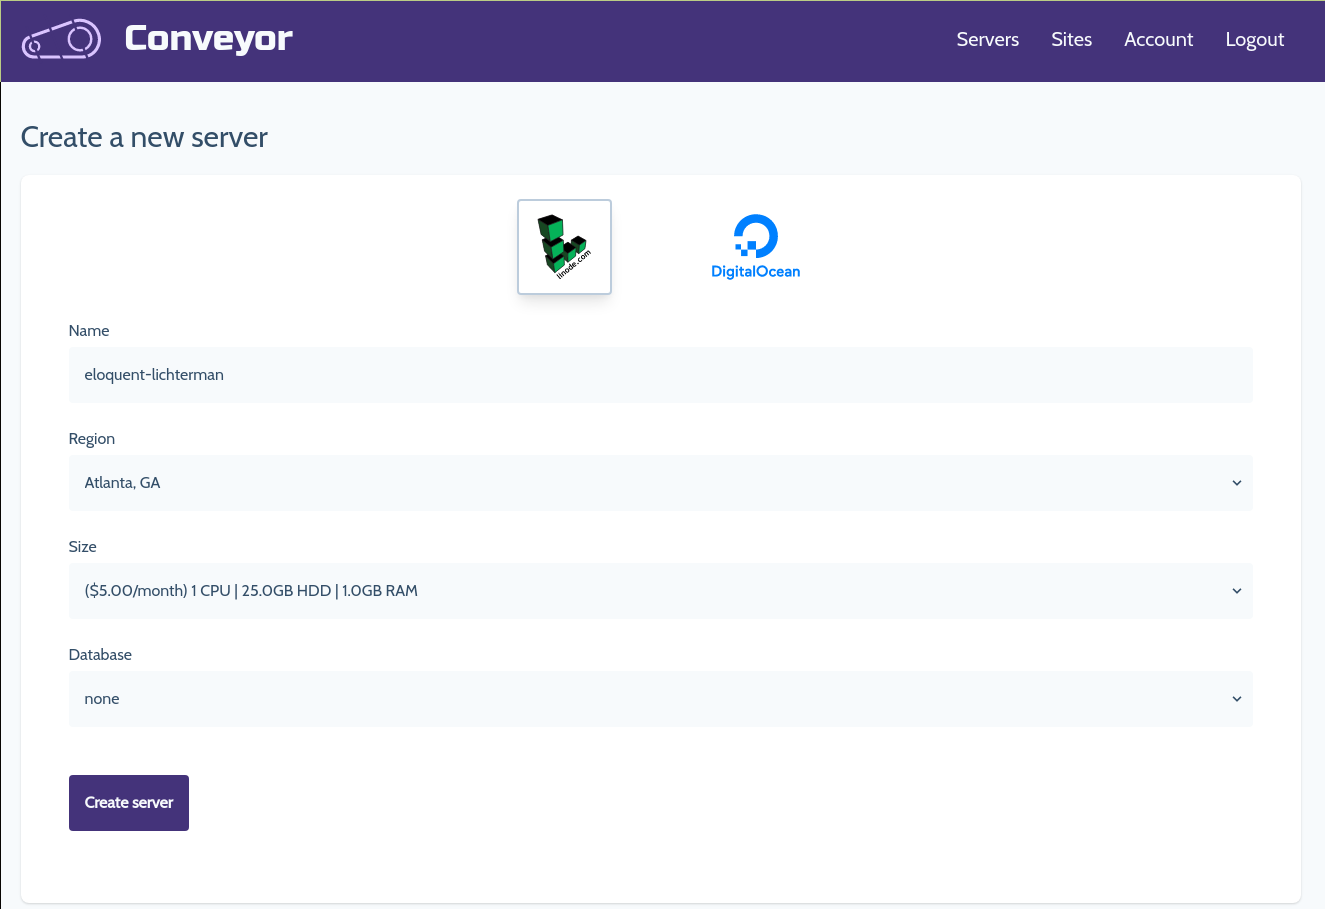
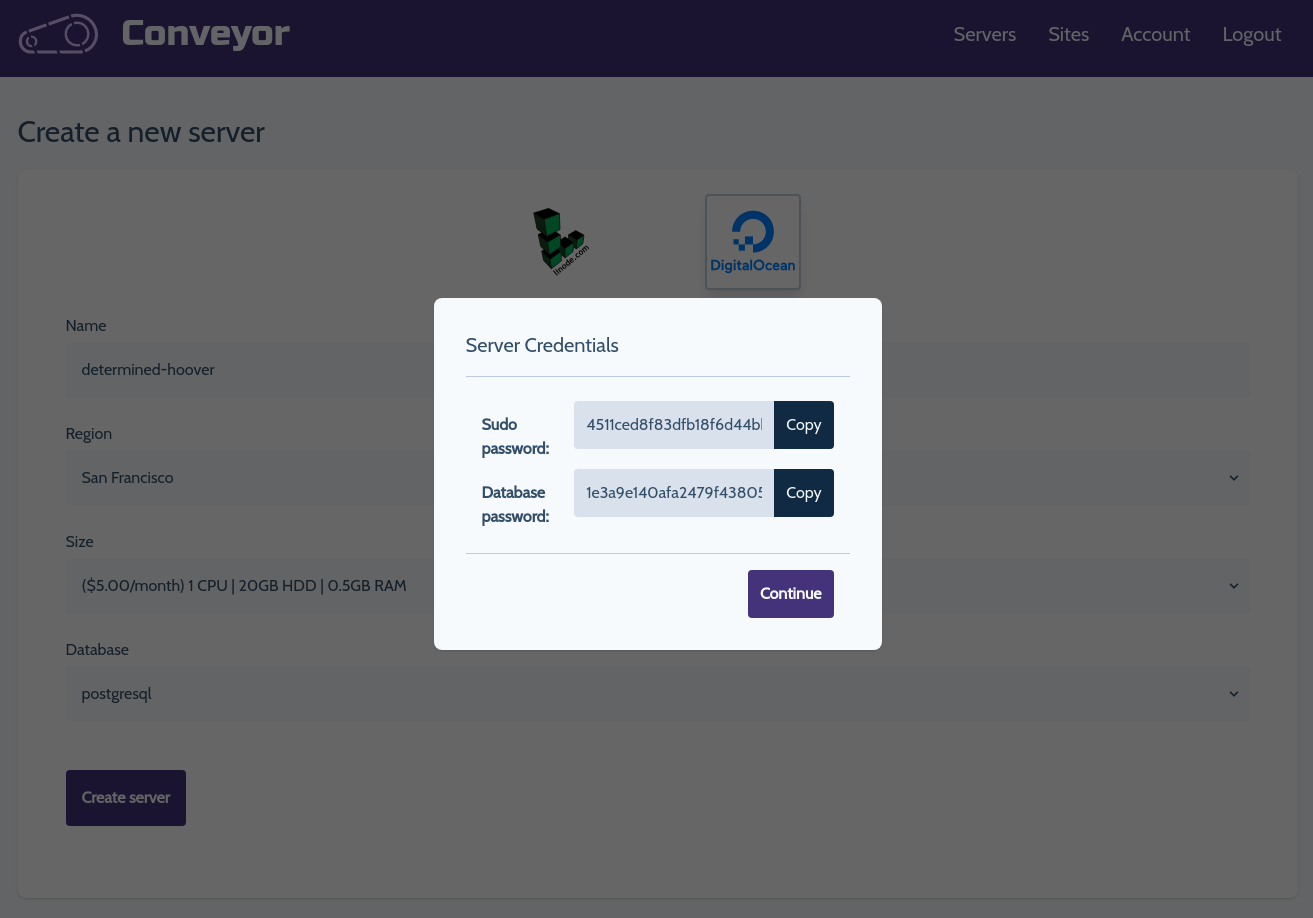
Select the name, location, size, and type of database and then select "Create Server". You will then be prompted with the sudo password and the password to the database user if you selected to install a database.
You will want to save these passwords for use in the future.
You can see the status of the server provisioning process in the events section on the "Server" page

Once the server is created return to the Sites page
Add some addition details about your site
In order to deploy your site we need to know a few details:
- The git branch to use for deployments
- A wsgi.py or a main.py file that provides an entrypoint into the application
- A requirements file for dependencies. Currently accepted files are a requirements.txt file or any txt file within a "requirements" directory.
Make sure to save your site details
Add additional commands to the deploy script if necessary.
An example of a simple deploy script might look like this if you need to build some frontend assets:
npm install
npm run build:css
Specify environment variables
Many sites use environment variables to store config values such as an app's SECRET_KEY. Click on Environment Variables from the side-menu to specify any addition config variables you may need.
Deploy your site
Now all you need to do is click the deploy button and wait while your site is deployed to your server. You can check the status by viewing the events page.
Enable SSL
To enable SSL just view the SSL Status from the sidebar. Now just click Enable SSL and check back in a minute to view the details of your SSL Certificate.
Enjoy launching as many sites as your server can handle
Conveyor allows you to have a very economical way to launch your sites. You can launch as many sites as you want on a server with no extra cost.