Resizing an ubuntu linux encrypted virtual machine
Posted on Thu 19 March 2020 in posts
Resizing a virtualbox disk only works for VDI/VHD and only for dynamic drives
If you have a fixed size drive you need to first clone the drive with
the following command (Do this anyway for a backup):
VBoxManage clonehd /path/to/ubuntu-vm.vdi ubuntu-vm-clone.vdi
Resize the cloned disk you created:
VBoxManage modifyhd clone.vdi --resize 110000
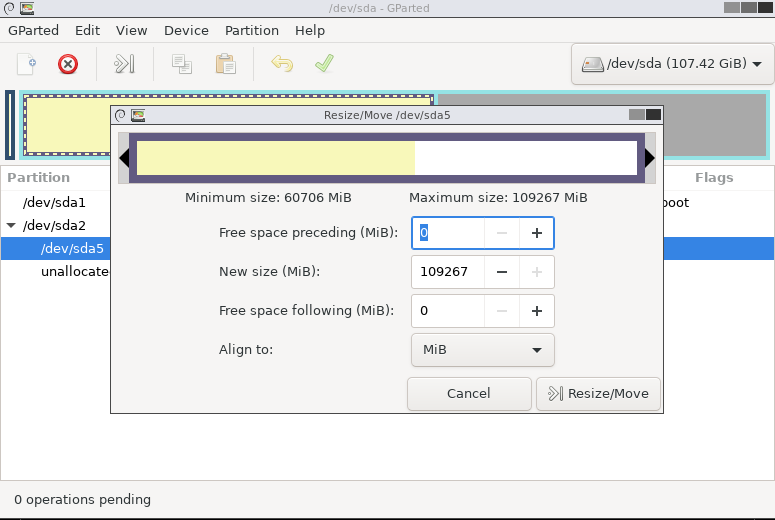
Use gparted to extend the disk to include the unallocated space we just created
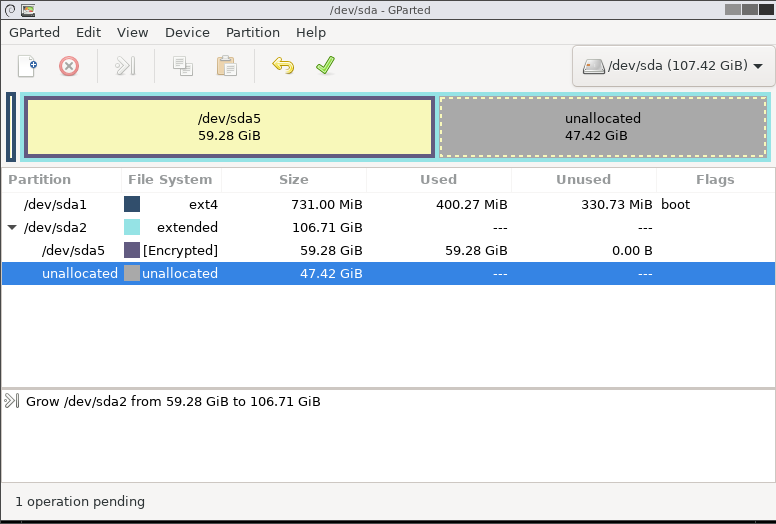
Increase the size of the encrypted partition to fill the space
Make sure to apply the changes from the previous step before moving on

Now we will resize the encrypted volume
Boot to ubuntu liveCD on the virtual machine
Install crypt tools
sudo apt-get update && sudo apt-get install lvm2 cryptsetup
Load cryptsetup
sudo modprobe dm-crypt
Decrypt file system:
sudo cryptsetup luksOpen /dev/sda5 crypt1
Activate LVM
sudo vgscan --mknodes
sudo vgchange -ay
Resize the crypt
sudo cryptsetup resize crypt1
Resize the LVM volume
sudo pvresize /dev/mapper/crypt1
resize the root LVM
- unlock the lvm
sudo pvchange -x y /dev/mapper/crypt1 - resize
sudo lvextend -l +100%FREE /dev/xubuntu-vg/root
The output of the lvextend command should look something like this:
user@ubuntu ~$ sudo lvextend -l +100%FREE /dev/xubuntu-vg/root
    Size of logical volume ubuntu-vg/root changed from <38.88 GiB (11218
    extents) to 104.76 GiB (26162 extents).
    Logical volume ubuntu-vg/root successfully resized.
Relock the LVM
sudo pvchange -x n /dev/mapper/crypt1
user@ubuntu ~$ sudo pvchange -x n /dev/mapper/crypt1
    Physical volume "/dev/mapper/crypt1" changed
    1 physical volume changed / 0 physical volumes not changed
Verify LVM resized
Check that things look correct by running sudo lvdisplay
Output should show a logical volume that has been resized
ubuntu@ubuntu-vm:~$ sudo lvdisplay
  --- Logical volume ---
  LV Path                /dev/ubuntu-vg/root
  LV Name                root
  VG Name                ubuntu-vg
  LV UUID                u0an5-Wd9W-mtr2-a0u2-rTpq-AtyZ-5PqbOS
  LV Write Access        read/write
  LV Creation host, time ubuntu, 2019-07-21 18:46:21 -0700
  LV Status              available
  # open                 1
  LV Size                105.75 GiB
  Current LE             27072
  Segments               2
  Allocation             inherit
  Read ahead sectors     auto
  - currently set to     256
  Block device           253:1

  --- Logical volume ---
  LV Path                /dev/ubuntu-vg/swap_1
  LV Name                swap_1
  VG Name                ubuntu-vg
  LV UUID                l2an5-kd9W-mtr2-a0u2-rTpq-AtyZ-2PqbO5
  LV Write Access        read/write
  LV Creation host, time ubuntu, 2019-07-21 18:46:22 -0700
  LV Status              available
  # open                 2
  LV Size                976.00 MiB
  Current LE             244
  Segments               1
  Allocation             inherit
  Read ahead sectors     auto
  - currently set to     256
  Block device           253:2
Resize the filesystem
sudo e2fsck -f /dev/mapper/xubuntu--vg-root
sudo resize2fs -p /dev/mapper/xubuntu--vg-root
Verify the filesystem has been resized
Run the lsblk command:
ubuntu@ubuntu-vm:~$ lsblk
NAME                     MAJ:MIN RM   SIZE RO TYPE  MOUNTPOINT
sda                        8:0    0 107.4G  0 disk
├─sda1                     8:1    0   731M  0 part  /boot
├─sda2                     8:2    0     1K  0 part
└─sda5                     8:5    0 105.6G  0 part
  └─sda5_crypt           253:0    0 105.6G  0 crypt
    ├─xubuntu--vg-root   253:1    0 104.7G  0 lvm   /
    └─xubuntu--vg-swap_1 253:2    0   976M  0 lvm   [SWAP]
Reboot the machine
If everything went correctly you should now be able to reboot the machine and enjoy the added disk space!